Sandustry Factory Blueprints and Production Chains
Proven layouts for gold, slag, lava, flowers, and energy — with ratios, ratios, and upgrade paths.
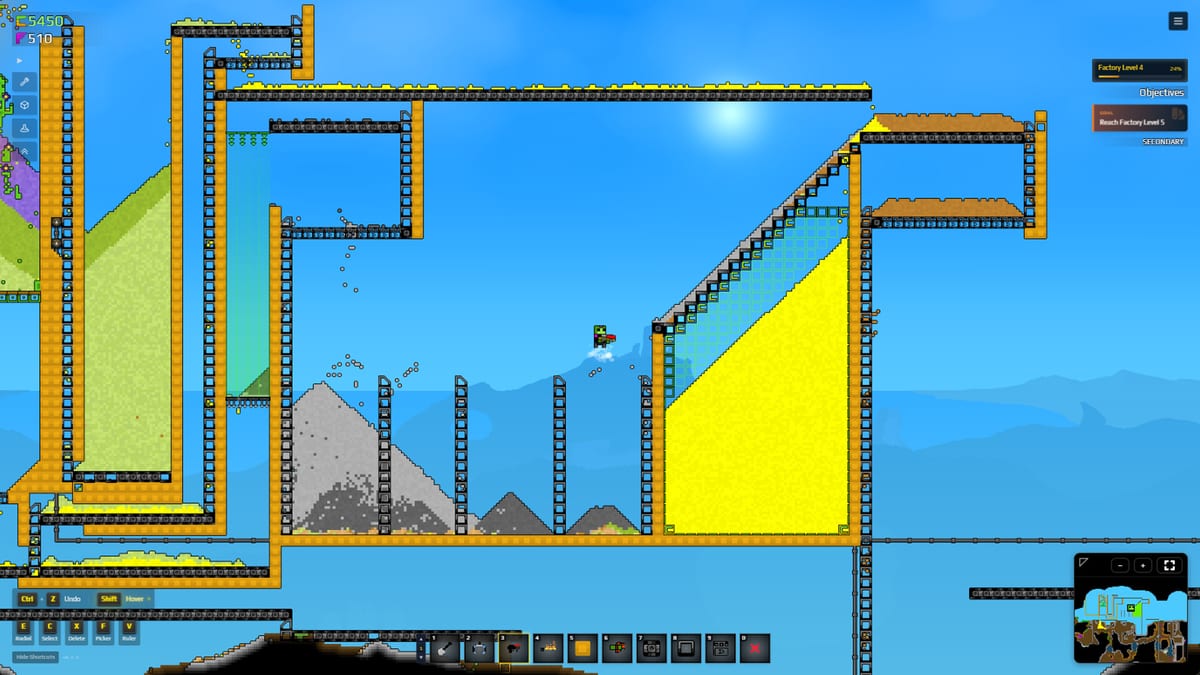
A factory blueprint is a layout that reliably converts inputs into outputs without you babysitting every step. Sandustry physics makes every blueprint a hypothesis — the pixel simulation either agrees or it jams. These blueprints are community-tested starting points: each has a rationale, known constraints, and an upgrade path. Copy the shape; understand the principle so you can adapt when the physics surprises you.
Blueprint philosophy
Sandustry factories run on three variables you control:
- Material flow — what enters, what exits, what gets rejected
- Heat — whether a process needs it, creates it, or is destroyed by it
- Density separation — the shaker, filter, and gravity decisions that sort mixed pixels
Every layout in this guide is an arrangement of those three variables. When a build fails, one of the three is wrong.
Gold factory blueprint
Purpose: Convert Sand + Water into Gold with slag as a byproduct.
Inputs: Sand (mined), Water (lake or pipe)
Outputs: Gold (collector), Burnt Slag (to press), Spores (flower line)
Sand pile → Sand belt → Mixer (+ Water) → Wet Sand belt → Diagonal Shaker row → Gold pit (collector)
                                                                              ↘ Slag belt → Lava pit or Flamethrower → Burnt Slag belt → Kinetic Slag Press → Gold merge
Key ratios (community benchmarks):
| Input | Ratio | Notes |
|---|---|---|
| Sand : Water | 1 : 1 | One Sand + one Water = two Wet Sand |
| Wet Sand : Gold | ~20–25% | Per shaker pass; varies with angle and pile depth |
| Slag : Burnt Slag | 1 : 1 | Flamethrower or lava auto-burns |
| Burnt Slag : Press gold | Variable | Clean press hits produce gold + Spores |
Constraints:
- Shakers must be diagonal — flat rows clog
- Slag belt must evacuate before next shaker pass
- Water supply must not flood the sand pile
Upgrade path: Add Filters → add second shaker row → add press → add lava burn lane
See How to Get Gold and Starter Factory Layout for the full walkthrough.
Slag processing blueprint
Purpose: Convert Slag into Burnt Slag, then press for secondary gold.
Inputs: Slag from shaker rows
Outputs: Gold (press), Spores (planter input)
Shaker slag output → Slag belt → Burn lane (Flamethrower or lava pit) → Burnt Slag belt → Kinetic Slag Press → Gold collectorTwo burn lane types:
| Type | Pros | Cons |
|---|---|---|
| Flamethrower lane | Mobile, no setup | Requires player time |
| Lava pit lane | Runs 24/7, hands-off | Requires Scoria-Cinder logistics |
The lava pit lane is the long-term goal. Build the flamethrower lane first; graduate to lava when you have Cryoblaster and rocket tools.
Critical rule: Never route Water into the burn lane. Lava + Water = steam explosion that deletes both.
See Slag Processing and Lava-Powered Factory for the full lava lane setup.
Lava heat blueprint
Purpose: Create a portable, self-running heat source for slag and flower burning.
Inputs: Scoria (from frozen lava), Rocket explosions
Outputs: Cinder, then lava (in contained burn lane)
Lava cave → Cryoblaster freeze → Scoria block → Rocket Launcher → Cinder powder → Vacuum/Belt → Cinder filter/pit → Flamethrower ignite → Lava pit
                                                                                                                                         ↓
                                                                                                                                   Slag from shakers
Cinder logistics rules:
- Cinder is launchable and belt-compatible — conveyors work for short distances
- Hauler Drones for distances beyond conveyor range
- Cinder floats on water — keep burn areas dry
- Store Cinder in a chest buffer above each burn lane
Density: Cinder at ~50 sits near Burnt Slag on filter charts. Use allow Cinder only filters to isolate it from slag on shared belts.
See Lava, Scoria, and Cinder and Lava-Powered Factory.
Flower and Fluxite blueprint
Purpose: Grow Fluxite for permanent upgrades — scanner, capacity, hover.
Inputs: Soil (planter box), Water, Amethelis petals (from flower farms), RedSand
Outputs: Voidbloom, then Fluxite from Flux Emanator
Planter boxes (Soil + Water) → Flower growth → Amethelis petals
RedSand pile → RedSand belt
Amethelis + RedSand → Voidbloom (mixing)
Voidbloom → Flux Emanator (single) → Fluxite grows below tile
Key constraints:
- Only one Flux Emanator per factory — plan its location carefully
- Amethelis must be harvested (Vacuum or drone) before petals are lost
- Voidbloom must be routed to the Emanator, not stored
- Flowers can be burned automatically on a lava pit instead of harvested — the lava produces Voidbloom without the Vacuum tool
See How to Get Fluxite, Flowers and Planters, and Voidbloom and Amethelis.
Energy blueprint
Purpose: Generate Florinol batteries for mid-game power after Fluxite upgrades.
Inputs: Amethelis petals (dried), Heat (lava or flamethrower)
Outputs: Florinol, then batteries
Amethelis petals → Dry (ambient or heater) → Florin vapor → Condense → Florinol → Battery fillEnergy uses: Aura Extractor, late-game drones, powered buildings. Energy is not needed for the core gold loop — it unlocks after Fluxite upgrades.
See How to Get Energy and Florinol Energy.
Multi-floor factory stacking
Advanced players stack blueprints vertically:
| Floor | Process |
|---|---|
| N | Dig face + sand bins |
| N+1 | Mixers + Wet Sand belts |
| N+2 | Diagonal shakers + gold pit |
| N+3 | Slag burn (lava) + Kinetic Slag Press |
| N+4 | Planter boxes + flower harvest |
| N+5 | Flux Emanator + Fluxite collection |
Each floor is a self-contained blueprint. Connecting vertical transport (launchers for sand, pipes for water) between floors is the engineering challenge.
See Dig Deeper for vertical factory planning.
Production ratio helper
Use the Production Ratio Helper to balance:
- Dig rate vs. belt speed vs. shaker count
- Water supply vs. sand throughput
- Burn lane capacity vs. slag generation rate
- Press throughput vs. slag availability
The tool prevents overbuilding one stage while another is the actual bottleneck.
Blueprint adaptation rules
When a blueprint fails:
- Check material flow — is the input actually reaching the process?
- Check heat — did a process need heat, create heat, or get destroyed by it?
- Check density separation — are mixed pixels sorted before hitting a filter or shaker?
- Test with a single batch — run one load through manually before scaling up
Sandustry physics rewards patience. A blueprint that works at 10% scale usually works at 100% scale if the principles are sound.
Frequently Asked Questions
Quick answers to the most common Sandustry questions.
What is the basic gold factory layout in Sandustry?
Sand → Mixer (+ Water) → Wet Sand → Diagonal Shaker row → Gold collector. Slag goes to a burn lane → Kinetic Slag Press for secondary gold. See the full blueprint above.
How do I build an automatic lava burn lane?
Freeze lava into Scoria → blast into Cinder → haul Cinder → fill Cinder-only filters → ignite with Flamethrower → drop Slag onto the lava pool. The lava burns Slag automatically 24/7.
What is the Fluxite production chain?
Flowers drop Amethelis → mix with RedSand → Voidbloom → feed the single Flux Emanator → harvest Fluxite growing below. Alternatively, burn Amethelis on lava for hands-off Voidbloom.
How do I size my factory using ratios?
Use the Production Ratio Helper to balance dig rate, water, shakers, and slag burn. Build one stage at a time and verify it is not starving the next.
Can I stack factory floors vertically?
Yes. Common stacking: sand/mixers on one floor, shakers and gold pit on another, slag burn and press below. Each floor is a self-contained blueprint. Use launchers and pipes for vertical transport.
Why did my blueprint jam?
Sandustry blueprints fail when material flow, heat, or density separation is wrong. Test with a single batch before scaling. Check: are shakers diagonal, is the slag belt clear, and is water kept away from lava?